
The fastest way to lift launch-day conversions is to put verifiable evidence of real people using your product exactly where buyers hesitate: the hero, beside the main call-to-action, and at checkout. Launch day social proof means visible, checkable evidence — a named review, a screenshot, a user photo — that a stranger has already bought, used, or vouched for what you’re selling. Publish a rating summary, two or three named testimonials with photos, and one live public post within the first hours, and link every claim back to its source.
TL;DR:
- Verifiable social proof should be prioritized and placed prominently on the landing page, especially near the call-to-action and checkout, to reduce hesitation.
- Collecting authentic proof, such as genuine testimonials, user photos, and public social media mentions, must be done quickly and documented thoroughly using a proof log system.
- Gathering proof during the initial launch window through early beta feedback, live reactions, and incentivized reviews enhances credibility and accelerates trust-building.
- Proper placement of reviews—near the price, under the checkout button, and in clickable formats—can significantly boost conversion rates, with testing confirming their impact.
- Disclosure of paid, incentivized, or automated engagement is legally required, and proof collection should focus on speed and verification rather than volume alone.
Table of Contents
- Quick launch-day social proof checklist
- High-impact launch-day tactics to create authentic proof fast
- Social media post ideas and sequence for launch day
- Capture methods: forms, scripts and workflows to verify and publish proof quickly
- Where to place social proof on landing pages, pricing and checkout
- Measurement and quick A/B tests for launch-week validation
- UK legal and disclosure essentials: what marketers must document and disclose
- Practitioner perspective: how Greediersocialmedia supports rapid, compliant proof
- The gap between launch-day advice and launch-day reality
- Give your launch profile a head start before the reviews arrive
- Launch Day Social Proof: Sources
- FAQ
Quick launch-day social proof checklist
Launch morning is chaos. You don’t need a strategy document; you need a priority order for what goes live first and where it lives on the page.
Work through this list in sequence rather than trying to do everything at once:
- Rating summary first. Even three or four reviews aggregated into a star rating beats no rating at all, provided every review is genuine and traceable.
- Three named testimonials with photos. Full name (or first name and initial), a real face, and a specific detail beats a generic five-star blurb every time.
- First piece of user-generated content. A photo, screen recording, or unboxing clip from an actual buyer, published within hours of the first sale.
- Screenshots of public posts, linked back to source. If someone tweets or posts about you unprompted, screenshot it and link the original post underneath.
- Placement priorities. Hero section first, immediately beside the primary call-to-action second, checkout page third.
- Verification minimums for everything you publish. A timestamp, a link to the original content, and a contact method for the person who gave it.
Skipping verification is the single most common mistake teams make under launch-day pressure — and it’s the one that gets flagged first if a complaint ever lands.
Pro Tip: Build a one-page “proof log” spreadsheet before launch day even starts. Columns for source, timestamp, permission status, and link. It takes ten minutes to set up and saves hours of scrambling when a journalist or the ASA asks where a quote came from.
High-impact launch-day tactics to create authentic proof fast
Manufacturing trust from nothing in a single day sounds impossible. It isn’t, if you treat proof generation as a series of small, repeatable actions rather than one big campaign.
- Convert your waitlist into a verifiable claim. If 400 people joined a waitlist, “Joined by 400+ people before launch” is honest and checkable if you can show the sign-up count. Never round up or estimate. A specific, linkable number (“Over 15,000 signed up”) is far more persuasive than a vague one, because unverifiable rounded figures are losing credibility with sceptical buyers who’ve seen too many inflated claims.
- Collect micro-testimonials from beta users and demo attendees before you go live. A single-line message works: “Loved working with you during the beta — mind if I quote you on the launch page? First name and a photo, if you’re happy to share one.” Keep the ask short and give people an easy way to say no.
- Capture live reactions as they happen. The moment someone posts about your launch unprompted, screenshot it, note the timestamp, and reply asking permission to feature it. Public posts are some of the most persuasive proof precisely because a reader can click through and verify them.
- Run short-term incentives that require disclosure. Offering a discount code or early-access perk in exchange for a review is fine, but it must be labelled. Anything that could influence someone’s opinion needs to be obviously identifiable as a paid or incentivised arrangement under the CAP Code.
The pattern across all four tactics is the same: real evidence, tightly documented, published fast. Effectiveness also depends on matching the proof type to the buyer’s actual doubt. Reviews reassure someone worried about product quality, but if the perceived risk is technical or financial, an expert or founder endorsement tends to carry more weight than a customer star rating.
Pro Tip: Ask beta testers for permission during the beta itself, not after launch. People are far more generous with quotes and photos when they’re still excited about early access than when they’re back to their normal routine a week later.
Social media post ideas and sequence for launch day
Sequencing matters as much as content. Post too much proof too early and you look desperate; post none and you miss the window when curiosity is highest.
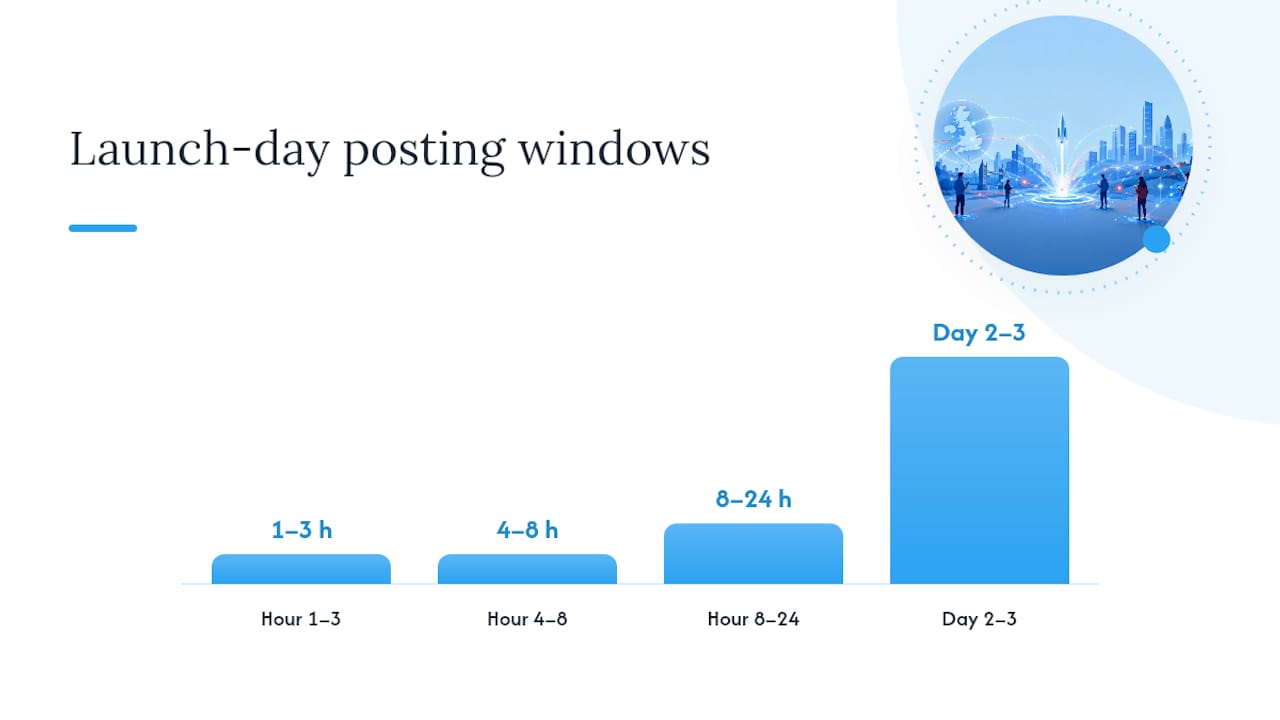
A workable hour-by-hour rhythm looks like this:
- Hour 0 (go-live): Announcement post with a clear call-to-action, no social proof yet because there isn’t any.
- Hour 1 to 3: Reshare or quote the first genuine reaction, even if it’s just one comment or DM, screenshotted with permission.
- Hour 4 to 8: Publish a call-for-photos post inviting early buyers to share how they’re using the product, tagging you for a reshare.
- Hour 8 to 24: Pin your strongest testimonial post to the top of your profile and pair it with a short quote request sent directly to your most engaged early customers.
- Day 2 to 3: Launch a simple hashtag prompt so buyers can self-tag their posts, then start compiling a rotating carousel of the best submissions.
Templates worth having ready in advance:
- Call-for-photos: “Got your hands on it already? Tag us in your first post and we’ll feature our favourites this week.”
- Short quote request: “Mind if we quote your comment on our site? Just need your first name and okay to link back to your profile.”
- Pinned testimonial post: A single strong quote, a named customer, a photo, and a link to the full review or original post.
- Hashtag prompt: A short, ownable hashtag tied to the launch, repeated in every post that day so submissions are easy to find and collect.
When you ask to reuse someone’s content, be specific about what you’re asking permission for. “Can we repost this on our Instagram and use the quote on our landing page?” is clearer, and more defensible later, than a vague “mind if we share this?”
Capture methods: forms, scripts and workflows to verify and publish proof quickly
Speed matters, but so does the paper trail. The ASA’s guidance on testimonials and endorsements requires marketers to hold documentary evidence that a testimonial is genuine, and to keep contact details for whoever gave it — which means your capture process needs structure, not just enthusiasm.
- DM script: “Thanks so much for the kind words! Would you be happy for us to quote this on our site, with your first name and profile link? No pressure either way.”
- Email script for beta users: “You were one of the first to try . If you’ve got 30 seconds, we’d love a one-line quote about your experience, plus a photo if you’re comfortable sharing one, for our launch page.”
- On-site feedback form: Three fields only. Quote, name, and a checkbox reading “I agree this can be published with my name attached.” Anything longer and completion rates drop.
For every piece of proof, store four things in one place: the original timestamp, a link to the original post or message, the person’s contact detail, and their permission confirmation. A shared spreadsheet or a lightweight CRM tag works fine on day one; you can migrate to a proper review widget once the launch settles down.
Simple automations help once volume picks up. A form submission can pipe straight into a review widget or a site embed via a webhook, so a testimonial captured at 9am can be live on the pricing page by lunchtime. Tools that monitor unlinked brand mentions across the web are also worth setting up early, since a surprising amount of genuine launch-day chatter happens without anyone tagging you directly, and converting those unlinked mentions into usable proof can surface testimonials you’d otherwise miss entirely.
Pro Tip: Ask for the photo and the permission checkbox in the same message as the quote request. Splitting it into a follow-up message roughly halves your response rate, because most people won’t come back to finish a two-step ask.
Where to place social proof on landing pages, pricing and checkout
Placement decides whether your proof gets seen at all. Buyers don’t read pages top to bottom; they scan for reassurance at the exact moment they’re about to commit.
- Rating summary and review count near the price. Someone comparing cost against value wants confirmation right there, not three scrolls down.
- One to three short quotes directly beside the primary call-to-action. Keep each under 20 words. Long quotes get skipped.
- Reviews positioned under the checkout button. This is the last hesitation point, and it’s where doubt kills conversions fastest.
- Every claim clickable. Link the quote or rating through to the original post or a stored review file so a sceptical buyer can verify it themselves in one click.
- Consistent visual treatment. Real faces, short copy, consistent photo crops, and proper alt text for accessibility and SEO.
A product page retest that isolated the rating summary and review carousel, moving them near the purchase point, produced a +15.56% conversion lift on its own, with no other changes to the page.
Checkout-level proof carries its own weight too. One test that added customer reviews directly under the “Pay now” button produced a measurable monthly revenue increase, simply by reassuring buyers at the exact second they were reaching for their card. Above-the-fold placement compounds the effect further: prominent review placement near the top of a page has been linked to double-digit conversion lifts across multiple independent tests, and it consistently outperforms static logo strips or vague “trusted by thousands” banners.
Measurement and quick A/B tests for launch-week validation
Launch week is a rare window where traffic spikes give you enough volume to test fast, so don’t waste it on guesswork.
- Track the metrics that actually matter. Conversion rate, checkout completion rate, lift by acquisition channel, and micro-conversions such as add-to-basket or email sign-up.
- Run tests for 7 to 14 days minimum. Shorter windows rarely generate enough volume to trust the result, especially if your launch traffic is front-loaded into the first 48 hours.
- Change one variable per test. Move the rating summary or swap the testimonial copy, but not both in the same test. Otherwise you won’t know which change drove the result.
- Compare against a genuine control. Run the version without proof against the version with it, on equivalent traffic segments, before rolling the winner out everywhere.
If your traffic volume is too low for a clean split test in week one, treat the placements from the checkout and pricing sections above as your working defaults, then formalise the test once volume normalises.
UK legal and disclosure essentials: what marketers must document and disclose
Fast doesn’t mean careless. The CAP Code requires that advertising and promotional material on social media be obviously identifiable as such, and content directly connected to the sale of goods or services can fall under ASA remit even when it looks like an organic post.
- Keep documentary evidence for every testimonial. The ASA’s guidance on testimonials and endorsements requires marketers to retain contact details for whoever gave the testimonial and to be able to prove it’s genuine if challenged.
- Label incentivised content clearly. Discount-for-review arrangements, paid influencer posts, and affiliate links all need a visible label such as “#Ad” or “Gifted”, not buried in a bio link.
- Never edit a quote to change its meaning. Trimming for length is fine; changing what someone actually said is not, and it’s the kind of edit that has led to ASA rulings against advertisers who couldn’t produce evidence backing their claims.
- Store everything centrally. One folder or spreadsheet with timestamps, links, and permissions saves you if a complaint ever arrives months after launch.
Practitioner perspective: how Greediersocialmedia supports rapid, compliant proof
Launch-day momentum often needs a push before organic proof has had time to build. Services that add real followers, likes, and views on Instagram, TikTok, YouTube, and Facebook can help a new profile or launch post look active enough to earn the first genuine reactions and comments that fuel everything covered above.
Used this way, engagement services are a scaffold for organic proof, not a substitute for it. If any paid engagement or incentivised arrangement influences what appears on your launch page, disclose it the same way you would a paid partnership, in line with the CAP Code rules covered above. Genuine testimonials and verifiable UGC still need to come from real customers with real contact details on file.
The gap between launch-day advice and launch-day reality
Most launch advice treats social proof as a display problem: pick a nice testimonial widget, drop in some star ratings, done. That’s backwards. The actual bottleneck is almost always capture, not display — teams simply don’t have a fast, low-friction way to ask for a quote, get a yes, and store the permission before the moment passes.
Where the conventional playbook falls short is speed of asking. Waiting until launch week is over to “collect some testimonials” throws away the exact window when customers are most enthusiastic and most willing to say yes. The best operators build capture into the product experience itself, asking for a quote or photo the moment someone gets value, not a week later in a follow-up email nobody opens.
If you take one thing from this, prioritise the verification habit over the volume of proof. Three testimonials with names, photos, and stored permissions will outperform twenty vague five-star blurbs, because a sceptical buyer can click through and check them. Treat proof as an ongoing capture system that started before launch and continues long after it, not a box you tick on day one.
— Irwin Lee
Give your launch profile a head start before the reviews arrive
Services that add real followers, likes, and views on Instagram, TikTok, YouTube, and Facebook can help a new profile or launch post look active enough to earn the first genuine reactions and comments that fuel everything covered above.
If your launch is happening on Instagram, the Instagram engagement packages cover followers, likes, and video views from £0.59, all delivered without needing your password. Whichever service you use, disclose any paid or incentivised promotion clearly, the same way you would for a sponsored post, so your launch-day proof stays both persuasive and above board. Check the current package options and get your launch post moving within the hour.
Launch Day Social Proof: Sources
- Testimonials and endorsements
- PDP Social Proof A/B Test: +15.56% Conversion Rate Retest – CONVERTIBLES
- Boost conversions 38%: The one landing page change (Backed by data) | Nova Pixel Insights
FAQ
What are examples of social proof?
Common examples include star ratings, named customer testimonials with photos, user-generated content like unboxing photos or reviews, screenshots of public social posts mentioning your brand, and visible follower or engagement counts. The strongest examples are always the ones a reader can click through and verify themselves.
Can you give examples of good launch-day post messages?
A call-for-photos post (“Got your hands on it already? Tag us and we’ll feature our favourites”) works well early on, while a pinned testimonial post pairing a short quote with a named customer and photo works best once you have your first genuine reactions. Both should link back to the original content wherever possible.
What is the 5:3:2 rule for social media posts?
Definitions of this rule vary across sources, and it isn’t backed by the launch-specific research behind this article, so it’s worth treating with some caution rather than following it strictly. A more reliable launch-day approach is the hour-by-hour sequence covered above: announce first, then layer in genuine reactions, UGC, and pinned testimonials as they arrive.
How do I get social proof fast on launch day?
Ask early beta users and waitlist sign-ups for a short quote and photo before launch day even starts, then capture live reactions and public posts as they happen and request permission immediately. Services like Instagram engagement packages can also help a new profile show enough visible activity to attract those first genuine comments and reviews.